Remove vs. Paint Over Wallpaper: Which Approach is Better?
Wallpaper offers distinctive patterns and textures, conceals flaws, and gives a wall finish that paint cannot reproduce. When put correctly, good quality wallpaper can last up to 10 years with minimal maintenance. For other homeowners, though, this durability might be a concern because the patterns and styles chosen decades ago don’t match with contemporary furnishings.
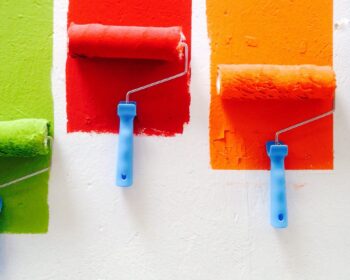
Paint is the material of choice for most homeowners wishing to update their interior decor because it is quicker to change than wallpaper, easier to apply, and less expensive. It can be very tempting to paint directly over your old wallpaper if you’re sick of looking at it. To achieve better results, you should always take down the wallpaper before painting, if at all possible.
Stripping down wallpaper may not be an option for homeowners who want to replace it with paint. The removal of the wallpaper can make the drywall issues worse. If this is your circumstance, you could prefer to paint over the wallpaper.
But when is it appropriate to paint over the wallpaper and when is it best to take it down? There are a lot of things to think about, from the state and appearance of the wallpaper to your future intentions for the room. The following advices below from professional Melbourne house painter will assist you in making this choice.
When you should Remove Wallpaper
In general, removing the wallpaper before painting will produce better, more durable effects than simply painting over it. In order to avoid the seams at the ends of the rows showing through the paint, wallpaper is often laid in rows. The textures and patterns in the majority of wallpaper patterns may also be visible in the paint because of this. A patch of wallpaper may bubble or peel off as a result of the moisture in the paint causing the wallpaper glue to loosen.
Wallpaper removal presents a number of difficulties. For starters, depending on how and when the paper was applied, the process may be challenging and time-consuming. If you live in an older house, there may be multiple layers of wallpaper there that are challenging to take off. In the event that your house is really old, there can also be drywall problems.
Your future intentions may also impact your decision to delete the wallpaper. It will be very challenging and labor-intensive to remove wallpaper that has been painted over. However, if you intend to stay in your existing home for a while, you should put on your work gloves and take down the wallpaper to prevent future issues.
Although it’s always preferable to remove wallpaper before painting, there are several instances in which painting over wallpaper could be a superior option. Painting over wallpaper preserves the drywall or plaster walls beneath the paper. In general, attempting to remove multiple layers of wallpaper or old wallpaper could damage your walls.
Obviously, wallpaper removal may be difficult and time-consuming. By leaving the wallpaper in place, you can paint your walls much more swiftly and easily. This is why many do-it-yourself painters are content to omit this stage.
If painting over your current wallpaper is your only alternative, make sure you carefully prepare the surface to get the best results. Secure the paper first, then swap out any damaged pieces. The loose pieces just need adhesive added to them so that they won’t fall after painting. Where the paper meets the ceiling and floor, add a thin coat of caulking around the perimeter of the wall. By sealing the edges, this lowers the likelihood that paint will peel following application.
Apply an oil-based primer to the whole surface of the walls before painting. The paper’s adhesive is sealed by the primer, preventing it from coming into contact with the paint’s moisture.
Steps for Painting Over Wallpaper
Follow these steps to learn how to paint over wallpaper in your home.
1. Clean the walls
Use a damp cloth to wipe the dust and debris from the walls. A layer of dust will make primer less adherent.
Use a diluted TSP solution to clean walls that are greasy and dirty (like in a kitchen that has been used frequently). Avoid soaking the walls in water or solution as this could soften the wallpaper’s adhesive and produce bubbles or loosening. Give the walls plenty of time to dry.
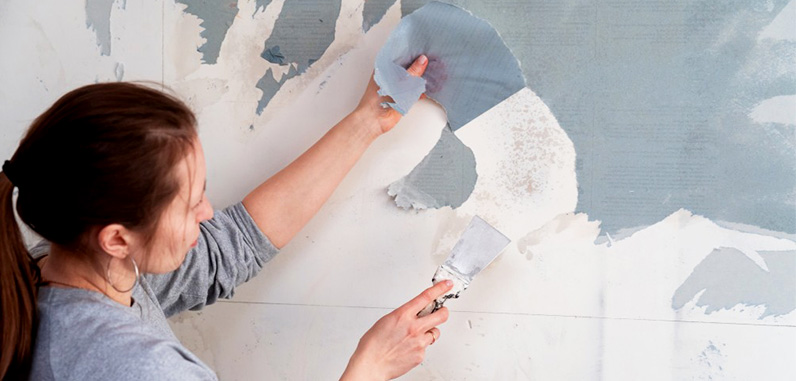
2. Repair any damages to the wallpaper
The weakest areas for adhesion are peeling edges or seams, so keep an eye out for these. Some experts advise reattaching these loose pieces with a small application of wallpaper seam adhesive.
Another suggestion is to lift such sections with a thin putty knife, remove any loose pieces, fill in the spaces with spackle to produce a level surface, and then lightly sand them after they are fully dry.
Use a palm or orbital sander to sand the entire wall until smooth if the wallpaper has a texture you don’t want the paint to reveal. Dust should be removed with a moist cloth.
3. Tape off molding and trim
Carefully tape off any baseboard, trim, wainscot, or moulding you want to keep safe using painters tape.
4. Prime the walls
You should apply an oil-based primer regardless of whether you’ll be utilising an oil-based or water-based topcoat. This is due to the possibility that a water-based primer could penetrate the wallpaper and weaken the adhesive.
A primer made of oil won’t accomplish that. Use a brush to fill in the edges and corners, much like when painting, and then a roller to complete the long stretches.
Follow the manufacturer’s instructions and give the drying process plenty of time. Ensure that the area has adequate ventilation.
5. Start painting
After the wallpaper has been cleaned, mended, and primed, paint it like you would any other surface. This will be especially important if the wallpaper has a prominent pattern or if you’re painting over dark-colored wallpaper with light paint. Two applications are probably necessary, with ample of drying time in between.